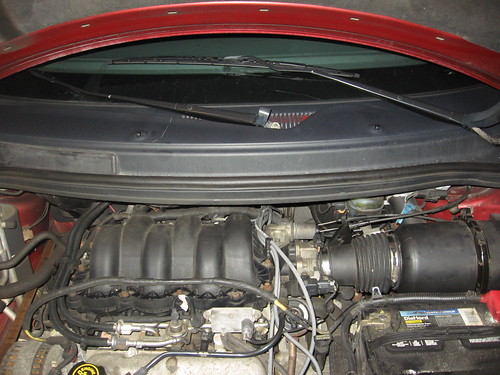
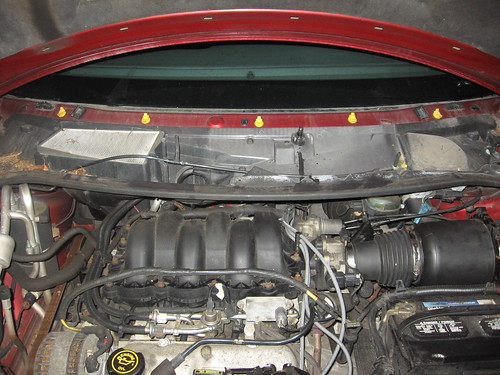
I had the task of trying access the rear spark plugs on my wife’s 2000 Ford Windstar. This one is equipped with 3.8 liter V6 which is transverse mounted. Upon first glimpse this looks like a daunting task. It can be done but it takes a little more time.
I hit the Internet to do a little research. With today’s automotive tune ups sometimes going 100,000 miles or more, Auto engineers place little priority on ability to do repairs on your vehicle. I can’t imagine professional mechanics having any easier time with this. They may just have a better assortment of tools at their disposal. I think deep in the bowels of Ford’s engineering department there is a memo that challenges them on how difficult they can make automotive maintenance. The goals are to:
1. Have you have to bring it back to dealer for maintenance so maybe you’ll buy a new car while your there.
2. That you’ll forget about maintenance and your car will break down or run crappy. So then you’ll run to the dealer and buy a new one. Sense a pattern here?
Back to my research. Two possible solutions came up the most. One was to jack the vehicle up and reach up underneath. Two was to remove the cowling just over the engine and reach over the top. Both camps seem have drawbacks. From going in from underneath risked hitting your arm on something hot or have rust or debris hitting you in the face. Even then it was a challenge to access the plugs.
The second choice was a bit more tedious because it involved removing the front cowling that houses the windshield wiper motor and assembly. I’m not a big fan of working underneath a vehicle so I chose number two.
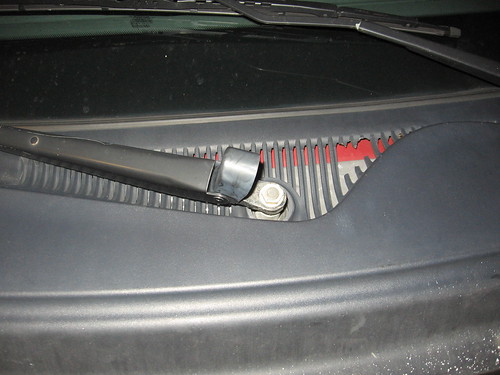
You’ll need to remove the windshield wiper arms. Flip open the cover at the base. You’ll need to remove the nut holding them in place. Once the nut is off you may need to spray some lubricant to get the arms off. I had one come off easy and the other needed a little more persuasion but, it did come off eventually.
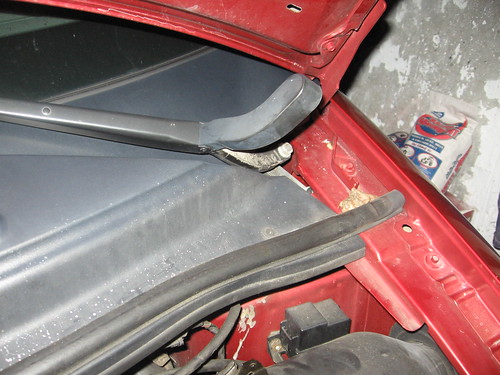
Next just behind the weather strip is a row of Phillips head screws which need to be removed. After these are removed the front you should be able to pry open a bit to see inside. You’ll need to reach in between to disconnect the windshield washer hoses before going any further.
Now carefully along top part near the windshield start pry up the top portion. These are held on by plastic clips and I’m sure they can break off easy. Once it was free I was able wiggle it up towards the windshield and remove it entirely.
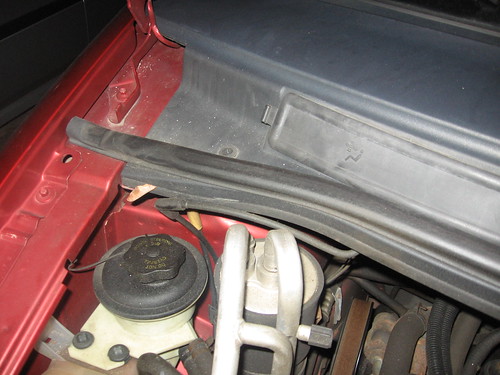
Now you’ll have more screws to remove. You can take out cabin air filter. You’ll need to disconnect the wiper motor electrical connect on the drivers side. The wiper motor/arms and all stay connected. There is also a plastic drainage connector (just above manifold)and one for the cabin air filter that needs disconnecting.
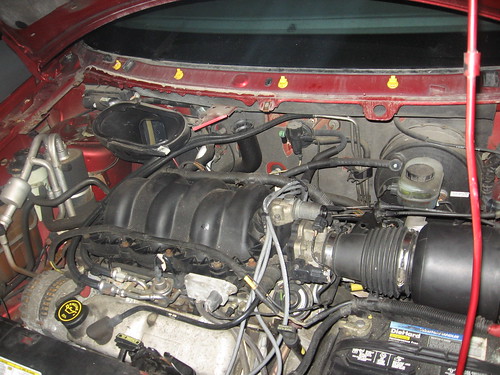
Once everything is disconnected the bottom half should lift out. From here you can reach behind to access the plugs. They still are a pain and your working half blind but, it’s doable and better than before. To reassemble just go in reverse order. To get to point in the picture it took me about 30-45 minutes to do. It’s not too hard but it is a bit tedious. I find it better than trying to reach from below. I’m hoping this may help someone attempting to do this. Thanks for reading and have a great day!
No comments:
Post a Comment